Lately, I have been fiddling with a new sourdough. I finally got the ingredients and amounts fixed around a month ago, but still wasn't entirely satisfied. Then I made a little tweak and kazam! Suddenly it all fell together. The tweak wasn't either ingredients or amounts, as those have stayed constant.
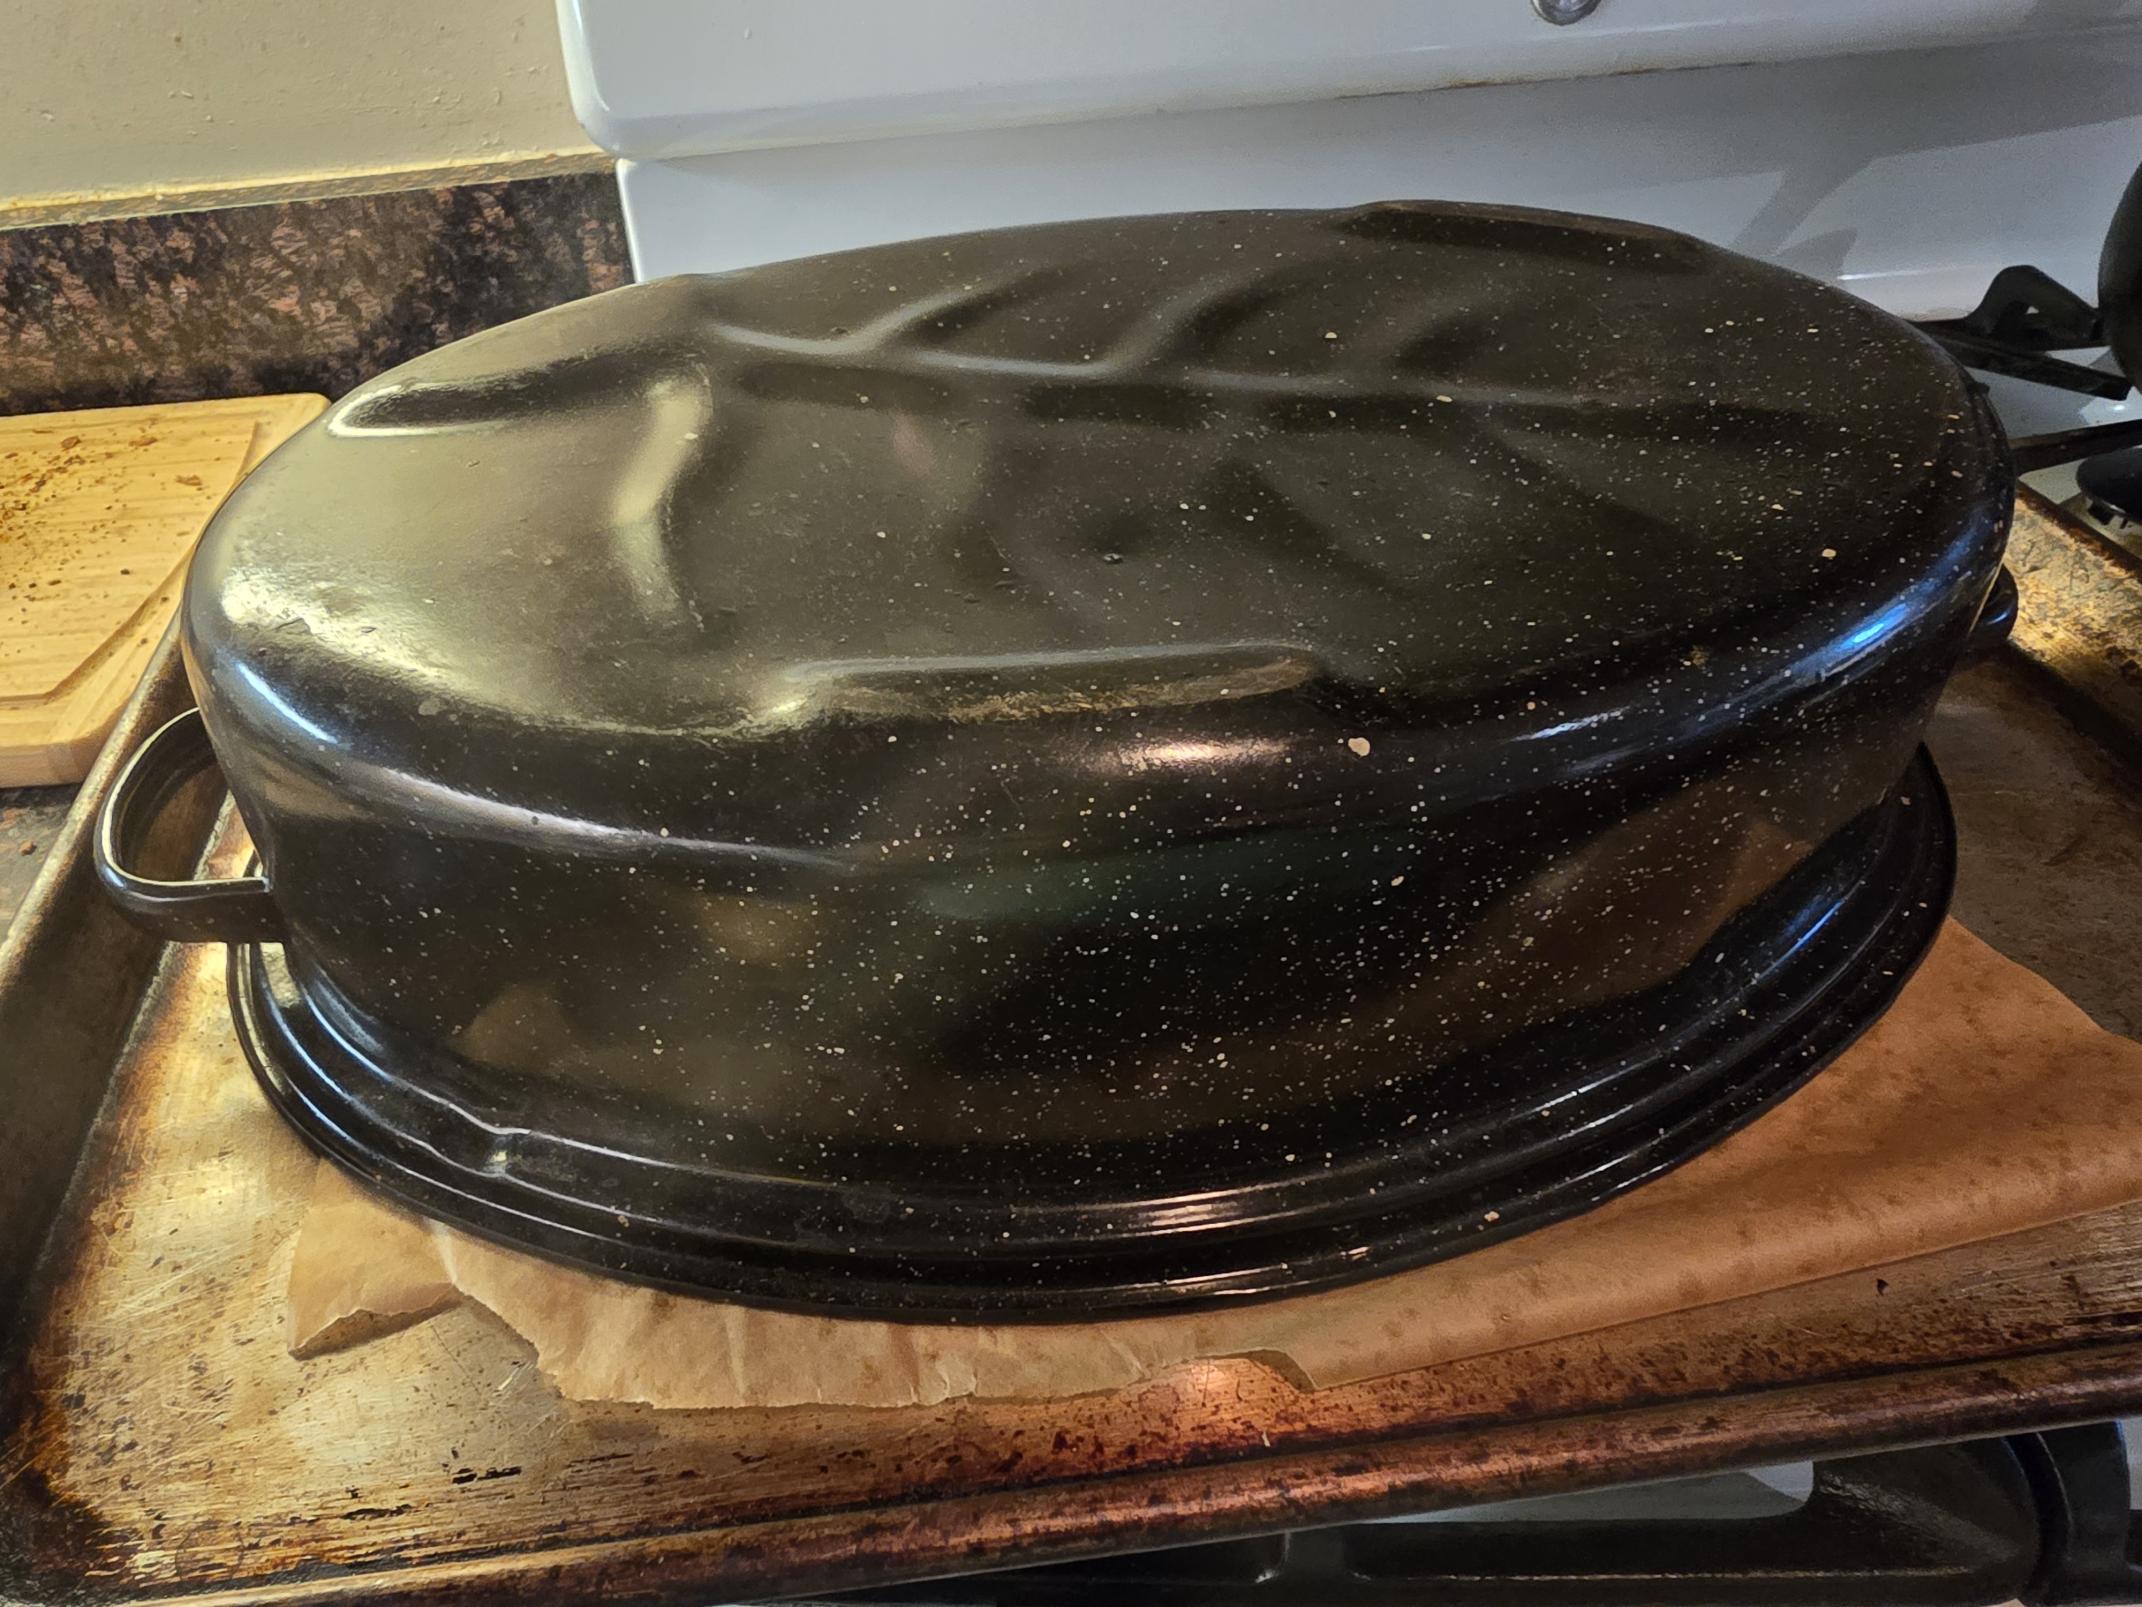
I have been doing covered baking as a way of generating steam. Here is my set-up in all its simplicity. This is a small turkey roaster. It is upside down covering the shaped loaf on a half sheet during proof. When the bread is ready the whole thing goes into the oven: sheet, loaf, and roasting pan.
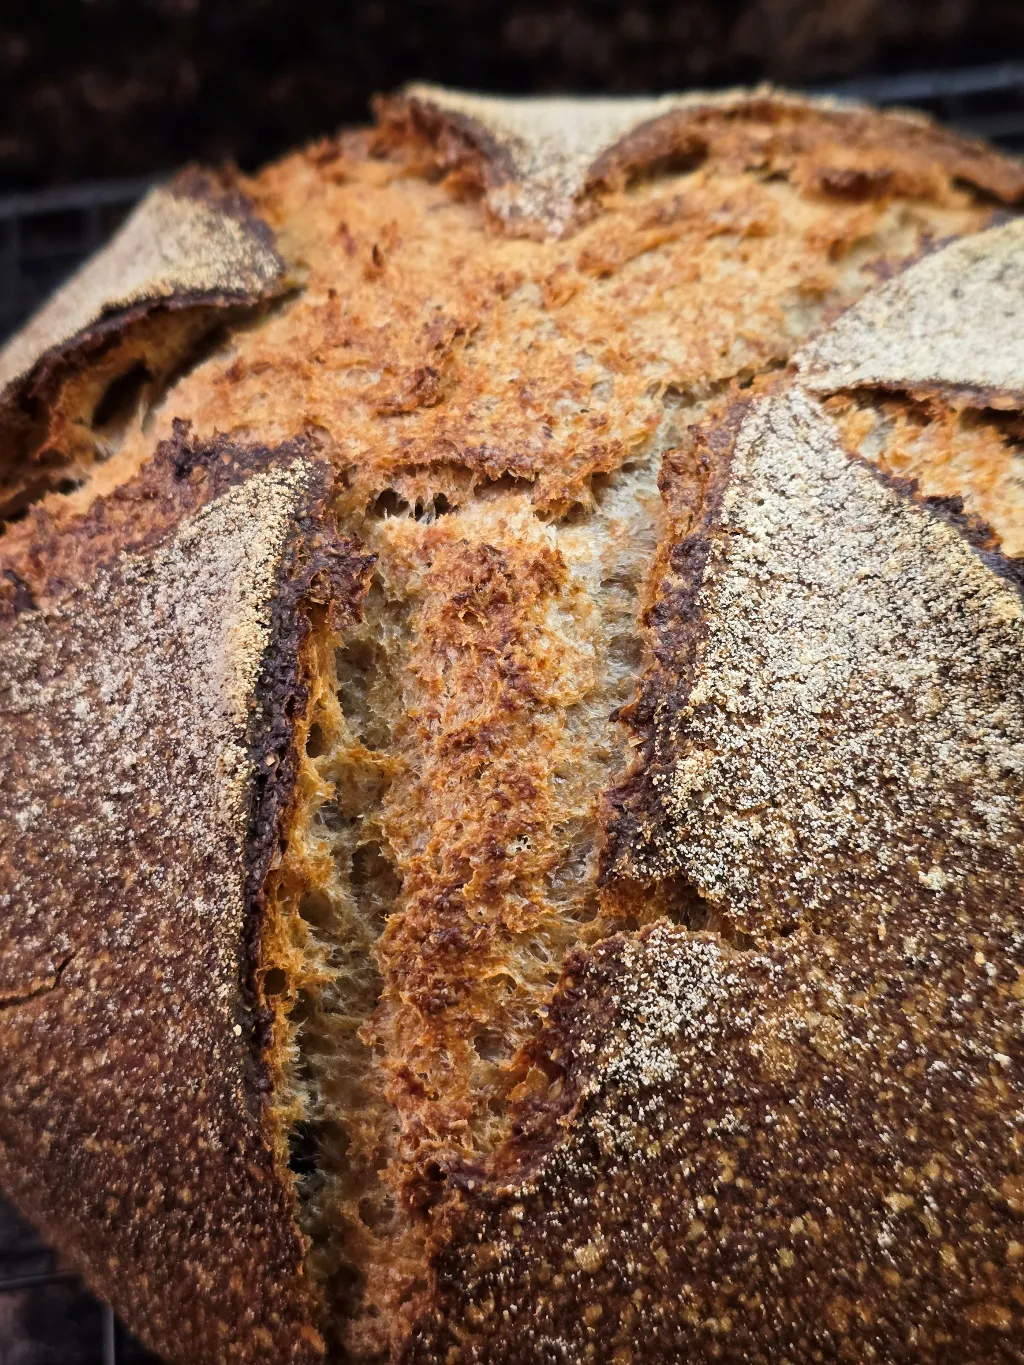
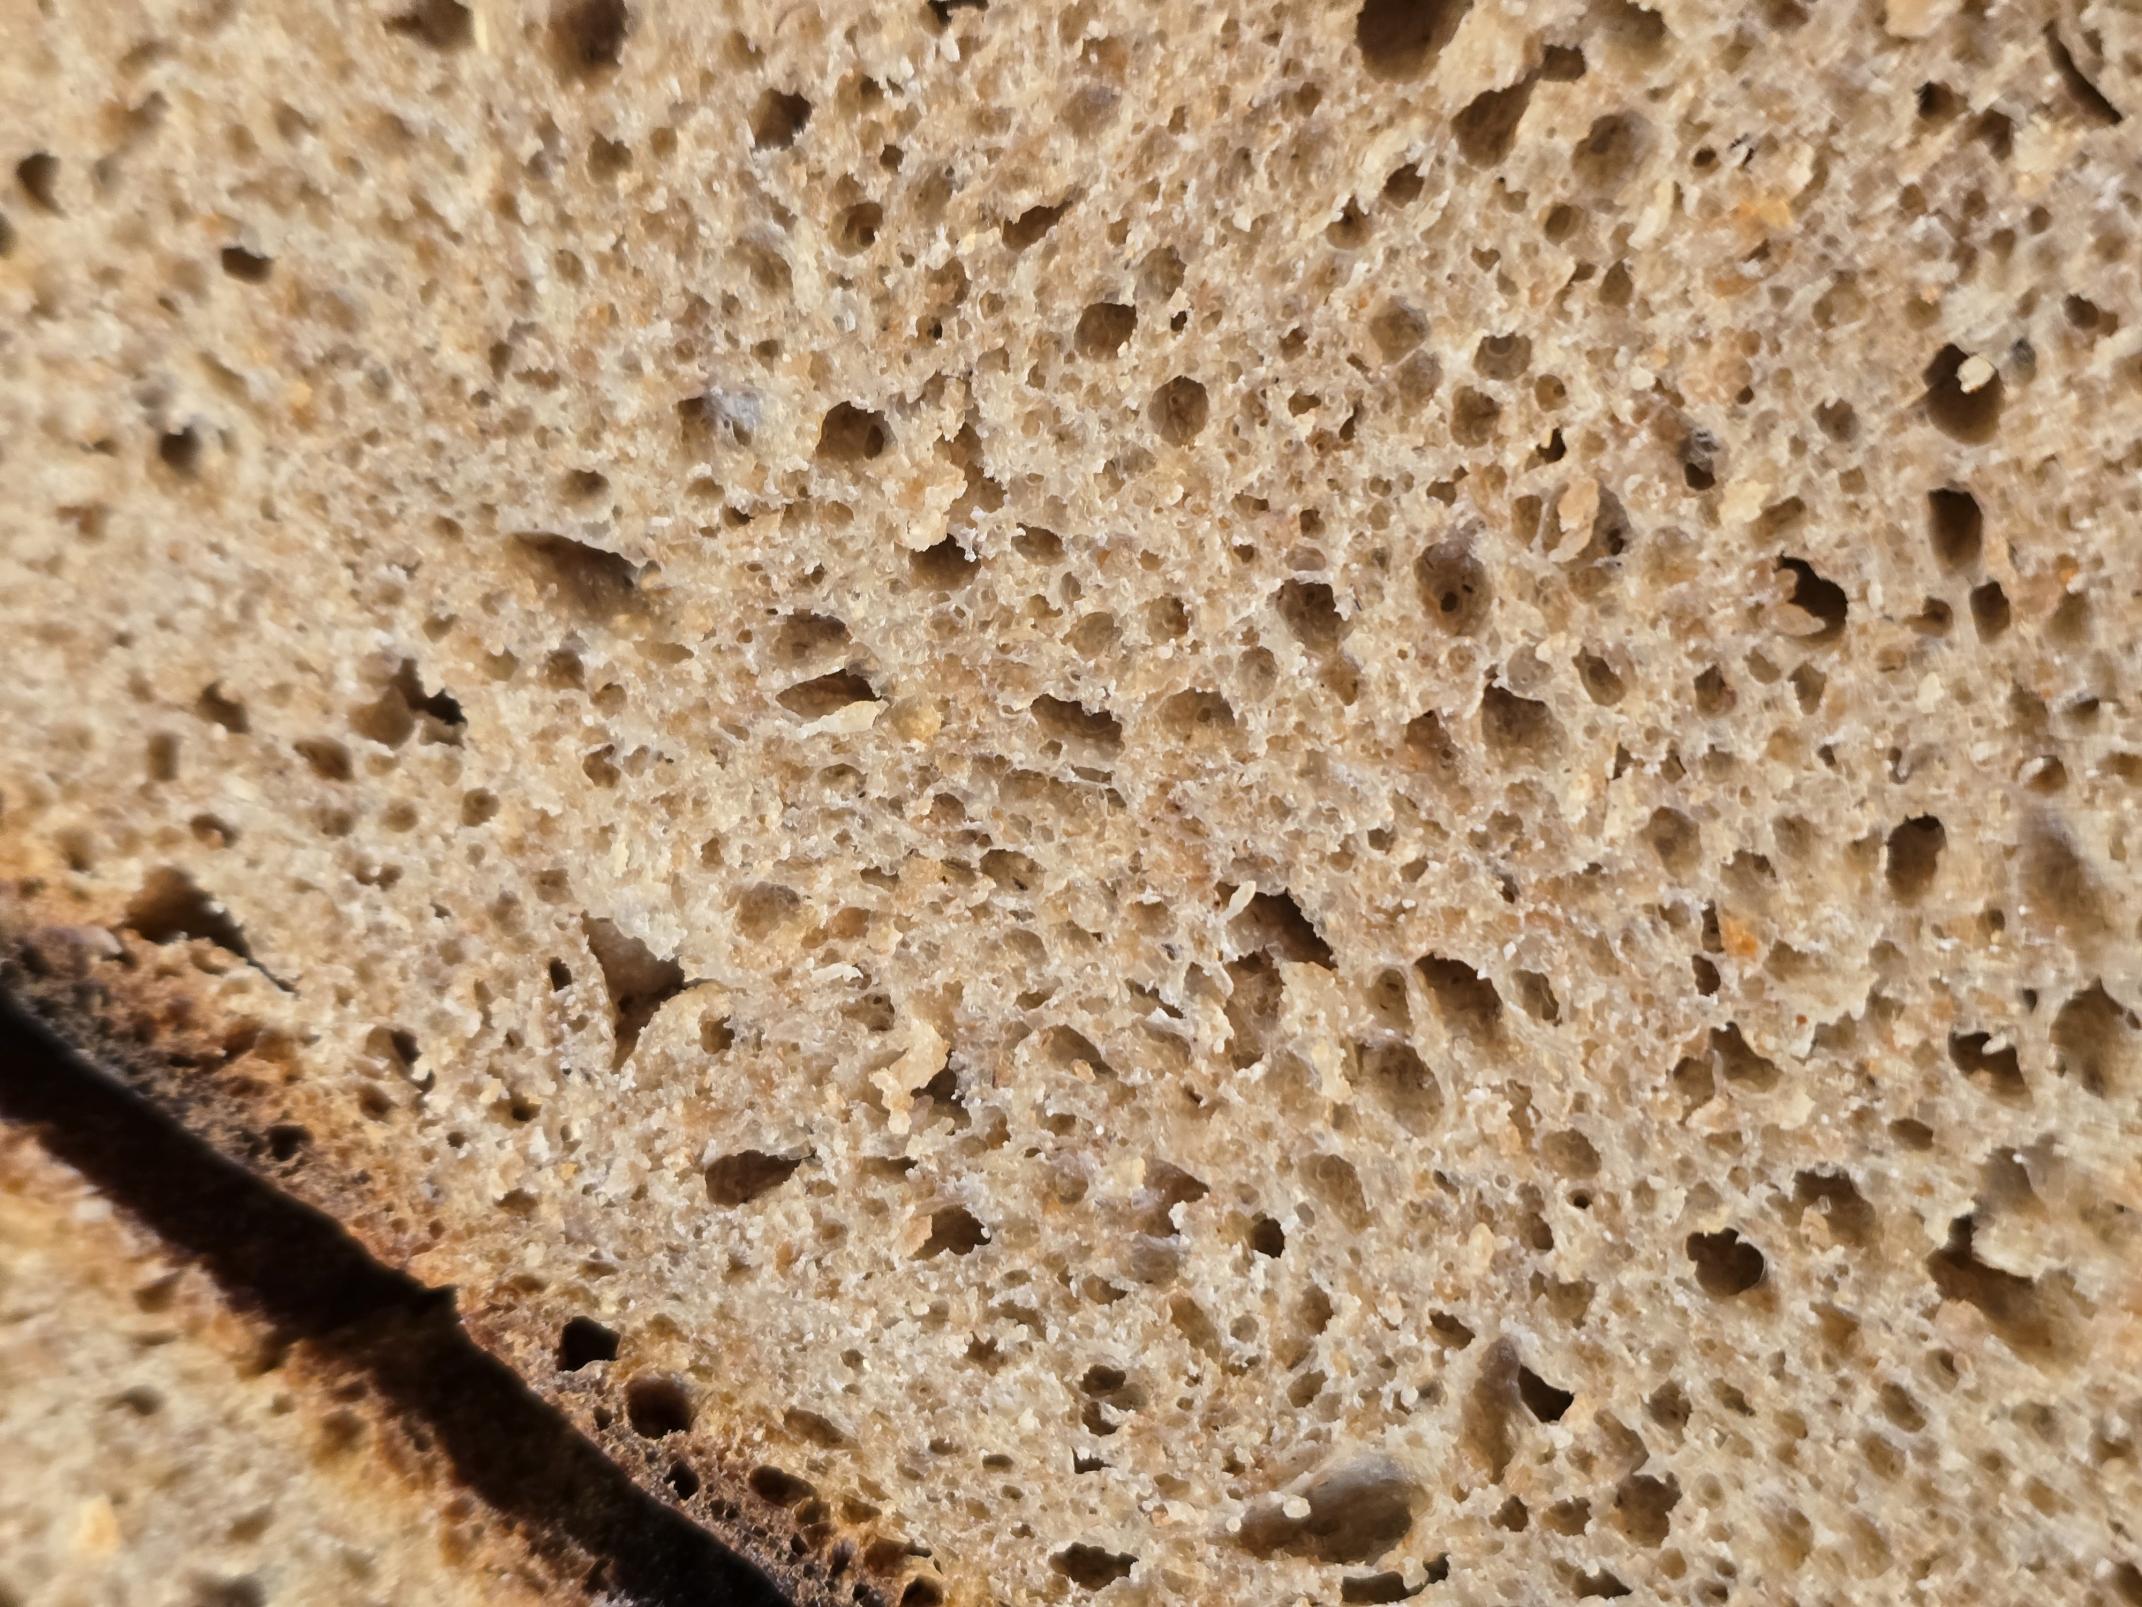
Because I listen to WHAT THEY SAY, I have been removing the roasting pan after 15 minutes, and then doing the rest of the baking uncovered for around 23 minutes. On a whim, I decided to try longer on the covered baking, so instead of 15 minutes, I covered for twice as long. The results were dramatic. The crust is dense and crunchy and so sweet! I don't know how to take a proper picture of crust, but here is a photo of the inside of the loaf.
Whole Grain Sourdough
High Extraction Flour 150
Whole Rye 150
Whole Wheat 150
Water 340
Salt 9
Diastatic Malt 5
Starter 110
Total 915
Total flour 514
Total water 387
Hydration 74%
Salt % 1.8%
Starter% 12%
Whole Grains 83%
Mix all
Stretch and fold twice in 1 hour
Bulk ferment for two more hours
Shape round and proof for 2 hour
Bake at 450 for 30 minutes covered
and 15 minutes uncovered
The flour is all sourced from Ground Up Mills in Western Massachusetts. For people in the area, I can't praise these guys enough. They are a small operation, but they produce quality flours. We used / still use them for their whole wheat at my bakery, and I realized I could just keep using them at home.
Now here is the bonus question. How do I keep my cover photos from being rotated? I tried everything I could think of but the picture above is rotated 90 degrees counterclockwise!
- varda's Blog
- Log in or register to post comments
That loaf looks great! Thanks for the interesting post. I've been thinking of trying to get a roaster like that and this gives me more motivation.
As for the pictures, one way is to rotate them before uploading to TFL. I don't have a smart phone (if that's what you are using) but it ought to be able to do a rotation. Otherwise any basic image viewing or editing program will be able to rotate a picture - Paint or IrfanView on Windows are two I use.
TomP
I am amazed by how covering the loaf with a relatively thin roasting pan just works. And there is no need for icecubes or preheated cast iron pans or steam cleaners or anything. I bought a bigger fancier roasting pan, thinking that I would use that, but for one loaf, you really don't need a lot. So I ended up using the new one for a big turkey at Thanksgiving. Go figure!
Unfortunately, I rotated the image before loading but that didn't work. Maybe it expects landscape orientation, and since my original photo is portrait, it just rotates it onto its side no matter what.
wow! Thanks for posting. Sounds like one I might try once I rebuild my starter. A couple of related questions, though: what was your thought on increasing the 'lid on' time? What moved you to try it? What did you expect to achieve? Why do you think it worked? Thanks!
Rob
So here's what happened. I had some dough that I had retarded overnight. I wanted to warm it up the next day before shaping it, so I put the covered bowl of dough on the back of the stove with the oven on which is a pretty toasty environment. Then things happened and I forgot about it, so it was there for at least two hours. When I got back to it, the dough was un-shapeable, so I kind of coaxed it unshaped into a dutch oven and baked it covered. After 15 minutes I took off the cover but it was still raw on top so I left on the cover for around 20 more minutes, and then removed it, and baked it for awhile longer. That bread was ugly as sin, but had delicious sweet crust. That got me thinking about how long to bake covered.
Thinking about it after the fact, I realized that in the bakery when we were making baguettes, or bread on the whiter side, where we wanted a thin crisp crust, we would steam the oven. Then after 2 minutes, we would pull the oven vent and open the oven door to release the steam. When we were baking whole grains or ryes and didn't care about a thin crispy crust, we wouldn't vent the oven. The steam would still dissipate eventually.
So I think that translates here. Although I am not sure why the crust is so sweet in this treatment, and not when the cover is removed earlier. And I don't think the breads we were making in the bakery without venting the oven had sweet crust. So I guess I'm not sure about that part.
I’ve been doing the 25 min lid on / 20 min off for a long time. It’s an excellent way to bake with no rigmarole as you noted.
So glad you discovered it as well. There are a few converts around TFL as well as some who do the hands off all in the bowl rest, few folds and good to go. Simplify is my goal.
Your loaf is beautiful! About pictures: if you are using an iPhone you change picture size in “ options” to medium THEN select the pictures you want to post. They will all post correctly.
You will see … the dots bottom left and when you touch those up comes the picture I posted here. Choose the last options - location included and up comes the screen to choose size. Choose med.

THEN select your pictures and they will load
I don't have an iphone. If I am doing the post on my phone (android) I just click on the picture, and then it rotates it. I don't understand why. If I rotated them first, anticipating that the app would rotate them, it didn't and the result was the same - rotated picture. Arggh! For the pictures in the body I was able to copy them and paste them in and it left them with the correct orientation. I will post it in a forum I guess and try to get to the bottom of it!
Thanks for your comments on the bread. What did you mean when you said
"as well as some who do the hands off all in the bowl rest"
I am not following!
Don't do anything - save for mixing here and there. Another - simple - really. Enjoy!
Thanks!
wrecked .
I should have used more punctuation.
There are converts to the graniteware roaster baking process as being superior to unwieldy heavy pots and the ease of the “ self-steaming” with a lid.
There are also converts to the “ put all ingredients in the bowl, stir til moist, wait 1°, do a few bowl folds and a possible lamination” and call it good. The development of the crust and crumb and flavor has been proven through numerous bakes . Time is your friend not mechanics . I’m glad you are having such great success once again with your home baking process. 🙏
Got it. Thanks.
mistakes show the way forward! thanks for sharing. -- Rob
Because otherwise you don't necessarily realize there is a different way to do things.
I think that’s most likely what’s going on with a) the darker metal/ thinner metal cover b) the longer covered period . The browning sweetness factors would seem to stem from that chemical reaction .
I find it’s the case with all my breads that are baked covered whether in the Granite Ware roasters large or small and the Pullman with lid. Both are baked covered 25 min uncovered 20 min. As you found the result is outstanding crust.
Interesting!
Well done Varda. I bet you got great satisfaction by solving the riddle. The crumb looks very good.
Gavin
Thank you!
I used to think sideways pics were just too large. Resizing them before uploading always corrected the problem. But, it only happens occasionally, so probably not the size. It was the editing and resaving of the pic that corrected it, not making it smaller.
It has to do with the EXIF orientation of pictures. This is eye-glazing stuff. The solution is to edit in some way (e.g., crop the picture a bit, resize it if you have that feature), resave it and upload. The saved copy resolves the problem.
With some programs, I think the rotate function shows the picture rotated without changing the meta data that declares the right orientation. Any image editing program should also change the meta data.
I looked up EXIF. It seems it is the metadata which is included in the picture file. I did do modifications and saved the file but that didn't seem to help. Maybe it is in that metadata, but I don't know how to access it. Thanks for your help.
Just spitballing here, but I wonder if the photo problem stems from posting pix in too large a file size or in an odd file format. I used to have all sorts of problems posting bread photos straight from my phone. I forget who here told me this little trick: that I should email them to myself as smaller files -- my outgoing mail server automatically asks me how big a jpeg to send, and I choose medium. Since I started doing that, then downloading the copies and posting them on this site, I haven't had any problems.
As I have been getting responses here, I have tried several video editing programs to make this go away. I did resizing and rotating the opposite direction. I went into gimp and exported to pdf, which isn't a weird filetype. The result is as you see in the lead image. No matter what I do, that's how it shows up. I took a quick look at the forums, and there doesn't seem to be one for trouble posting. Does Floyd still own this site? I suppose I could ask him. Thanks for jumping in!
Your problem sure seems persistent! When you resized pictures, do you know what size they ended up? For me, images that are 1024 pixels across have always displayed as expected.
I will check. Thanks.
Varda
You got it! I went back into gimp and resized it to 1024 pixels across. Please see above! Thank you.
Ha! At last! That topmost picture looks fine, much better.
TomP
Excellent baking Varda. Ages ago I did a timelapse video of one of my hearth loaves baking. From that I found that the oven spring and bloom continued up to about 25 mins. From that discovery I posted about extending the steam baking portion of bakes. So that would be lid on or with steaming equipment.
Benny
Interesting, Bennie. In my oven almost all the rising action takes place in the first 5 - 8 minutes. Maybe that's because it vents the steam so quickly.
Tom, I was surprised when I saw this. I was doing time lapse videos with each bake years ago and it was pretty consistent that the oven spring was still going on past the time where I would usually vent the oven of the steam. As a result, I now steam bake for 25 mins when steam is needed.
Benny
Thanks Benny. I am not surprised that the loaves kept expanding well into the bake, but that must have been cool to see it. Once you coat the baking loaf with steam that protects the loaf and it can continue to expand even if you vent off the steam. The difference that the length of steam makes is in thickness of the crust. So for a baguette or other white loaf where you want a thin crisp crust, you want a short steam period, and for a thicker crust, you want a longer period. I don't think it is a longer steam period that creates the sweet crust. I think it is the cover itself, as Trailrunner implied in her comment above. But that said, I really don't understand what the mechanism is.
a few years back, I got to bake with an Anova oven, a small, precise countertop electric oven with built-in steam and a big window so you can watch what's cooking, and, at least for ryes, the rise continued for the entire bake. It was astonishing: the loaves were still elevating until the minute I pulled them from the oven.
I almost persuaded myself to get one of those a few years back. Do you know how well they held up and how well they did other kinds of oven tasks?
I don't know, Tom. But I'll ask. I only used it for bread. I have to say it was amazing for baking ryes. It's the only oven I've used where the bake time was exactly as specified in the recipes. And it's the only oven I've used that consistently produced instagram-worthy loaves. Wheat breads were another matter: they tended to bake quicker than advertised and sometimes to scorch. One thing nice about the digital readout was that you could see precisely how much the temp dropped when you loaded the oven and how long it took to bottom-out and recover after you shut the door.
So I happened upon a bag of sprouted khorosan flour and thought: why not? It could serve as the malt in this recipe. So last night I used my rebuilt rye starter and mixed a highly altered version of your formula: 1/3 rye, 1/3 sprouted khorosan, 1/3 a mixture of bread flour and whole spelt.
In other words, a completely different bread, but inspired by your technique.
Here's the result:
It fermented relatively quickly -- an hour with folds, 2 hours bulk, and 1.5 hour proof. And, yeah, after 30 min with the lid on/15 off, the crust is wonderfully, subtly sweet (although not super thin and crispy.) I like the khorosan flavor. And, as an impatient baker, I like the idea of a satisfying sourdough boule that I can take from mixing to eating in 5-6 hours.
Thanks and cheers!
Rob
I like the look of this bread, Rob. Must have been just lovely to eat!
-Jon
Thx, Jon. Yeah, it's good.
Looks extremely tasty. I wish I could have a bite! Am I right that you didn't score? And I wouldn't expect the crust to be thin with that long steam period. Short steam period = thin. Long steam period = thick. The thicker crust gives more room for that delicious sweet flavor!
Thanks, Varda. The dough was quite slack and on the verge of overfermentation, and I was worried that if I did the traditional cross slash, it would spread & not rise -- but it sprawled more than I wanted anyway, even unscored.
As for steaming and crust thickness--I traditionally bake my go-to deli rye (45% rye) 20 minutes lid on/20 minutes off and the crust is generally (if I've hit the fermentation right) super thin & sweet. I guess every bread has its sweet spot.
I guess I was thinking about Baguettes. The only way we could get the crust right in our steam ovens was by venting very quickly after steaming. That was also true for other whitish breads but not true for multigrain.